Dockerizing Your Applications: Single Tier application
👋 Hello, and welcome to my DevOps journey! 🚀 I am Priyanka Varshney,🛠️ As an aspiring DevOps engineer, I'm all about bridging the gap between development and operations, making software delivery seamless and efficient. 💻🔧 On this Hashnode blog, I'll be sharing my learnings, experiences and adventures as I dive deep into the world of continuous integration, automation, and cloud technologies. ☁️⚙️ Let's connect, learn, and grow as a vibrant DevOps community. Follow my Hashnode blog, and let's embrace the DevOps adventure together! 🤝🔗
1. Single-Tier Application
In a single-tier application, you typically have just one component (for example, a backend or a front-end app) running in a container. Here's how you'd proceed for Dockerizing it.
Example 1 : Node js-app
Steps for Single-Tier:
Clone the GitHub repository for the project (this could be a simple web application, for example, Node.js).
git clone https://github.com/var-priya/simple-nodejs-app.git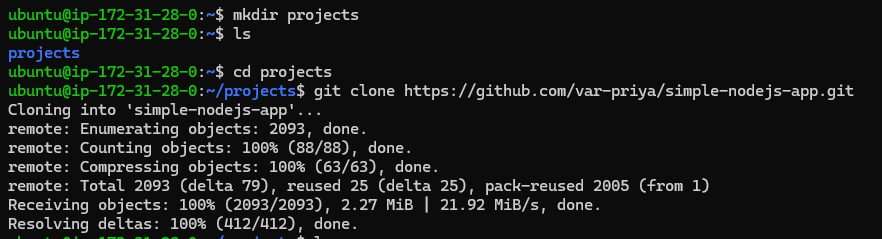
Create a Dockerfile to package the app.
Dockerfile for Node.js (
Dockerfile):
dockerfileCopy# Use the official Node.js image as the base image
FROM node:18

# Set the working directory in the container
WORKDIR /app

# Copy package.json and install dependencies
COPY package*.json ./
RUN npm install

# Copy the application code into the container
COPY . .

# Expose the port your application will run on (e.g., 3000)
EXPOSE 3000

# Command to run the app
CMD ["npm", "start"]
Explanation:
FROM node:18: This sets the base image to the official Node.js image (version 18 in this case).
WORKDIR /app: Sets the working directory inside the container to
/app.COPY package.json ./*: Copies
package.jsonandpackage-lock.json(if available) to the container to ensure dependencies are installed correctly.RUN npm install: Installs the Node.js dependencies defined in
package.json.COPY . .: Copies the rest of the application files to the container.
EXPOSE 3000: Exposes port 3000, or whatever port your app uses, so the container can communicate with the host machine.
CMD ["npm", "start"]: Defines the default command to run when the container starts (in this case, it starts the Node.js app).
Build and run the Docker container.
  #build the image
  docker build . -t nodejs-app:latest

  #check the images
  docker images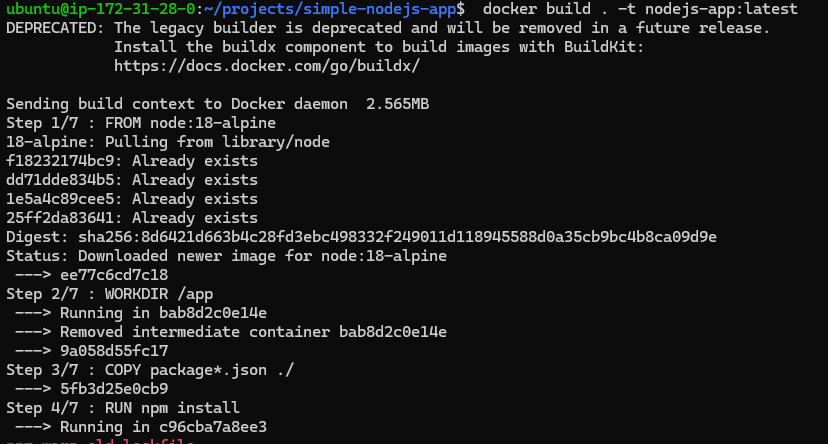
  #Run the Docker container
  docker run -dp 3000:3000 nodejs-app:latest

  #check the container
  docker ps
Once your container is up and running, you should see logs indicating that the nodejs app is running on all interfaces:
  * Running on http://127.0.0.1:3000
  * Running on http://172.18.0.3:3000
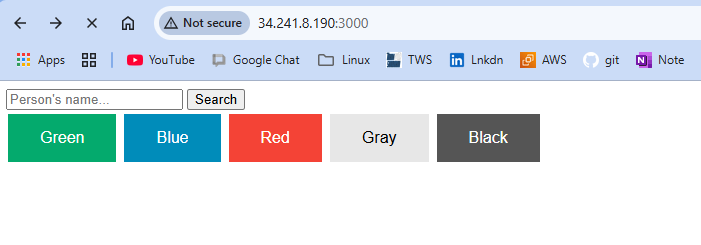
This means the app is now accessible on your local machine at:
http://localhost:3000
Example 2 : React_django demo app
Django is a python web framework
Clone the GitHub repository for the python project (this could be a simple web application, for example, django).
git clone https://github.com/var-priya/react_django_demo_app.git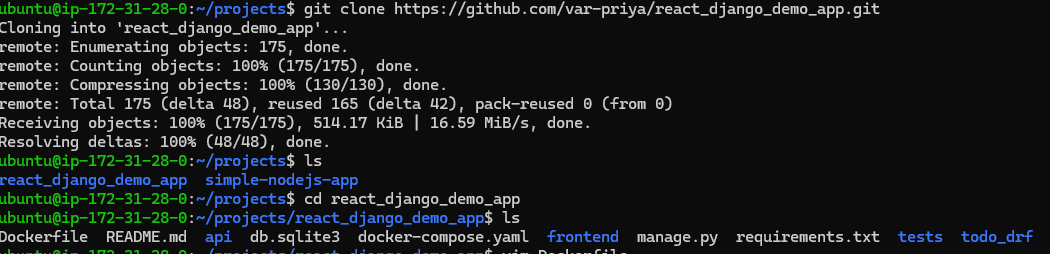
Create a dockerfile :
Dockerfile for Python:
  FROM python:3.9

  WORKDIR /app

  COPY requirements.txt .
  RUN pip install --no-cache-dir -r requirements.txt

  COPY . .

  EXPOSE 8000

  CMD ["python", "manage.py", "runserver", "0.0.0.0:8000"]
Build and run the Docker container.
  #build the image
  docker build . -t react-django-app:latest

  #check the images
  docker images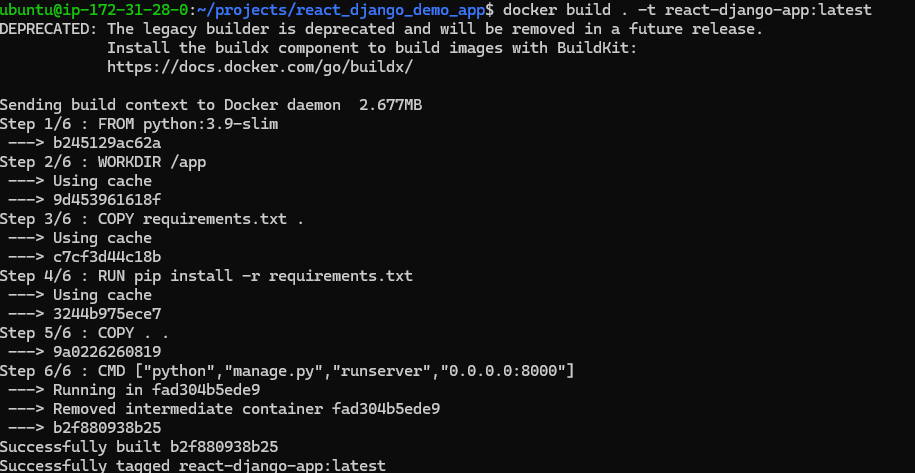
      #Run the Docker container
      docker run -dp 8000:8000 react-django-app:latest

      #check the container
      docker ps
Once your container is up and running, you should see logs indicating that the python app is running on all interfaces:
  * Running on http://127.0.0.1:8000
  * Running on http://172.18.0.3:8000
This means the app is now accessible on your local machine at:
http://localhost:8000
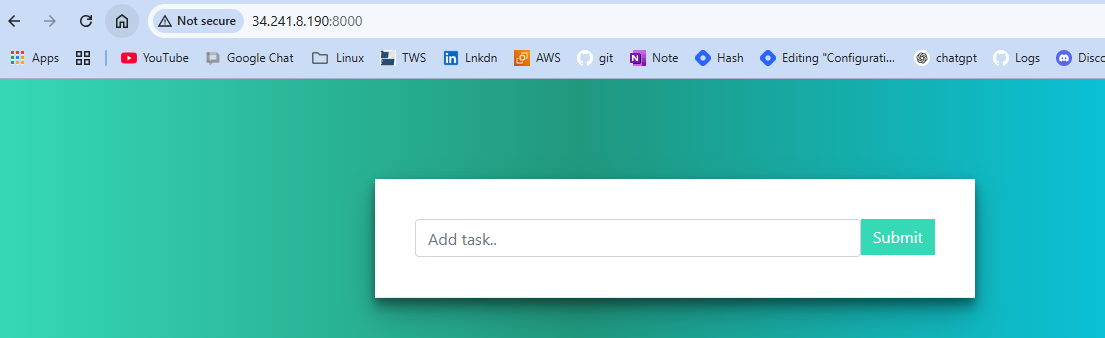
Example 3: React_django demo app:
Clone the GitHub repository for the python project (this could be a simple web application, for example, django).
git clone https://github.com/var-priya/django-todo-cicd.gitCreate a dockerfile :
Dockerfile for Python:
  FROM python:3.9

  WORKDIR /app

  COPY . .
  RUN pip install django==3.2

  CMD ["python", "manage.py", "runserver", "0.0.0.0:8000"]
Build and run the Docker container.
  #build the image
  docker build . -t  django-todo:latest

  #check the images
  docker images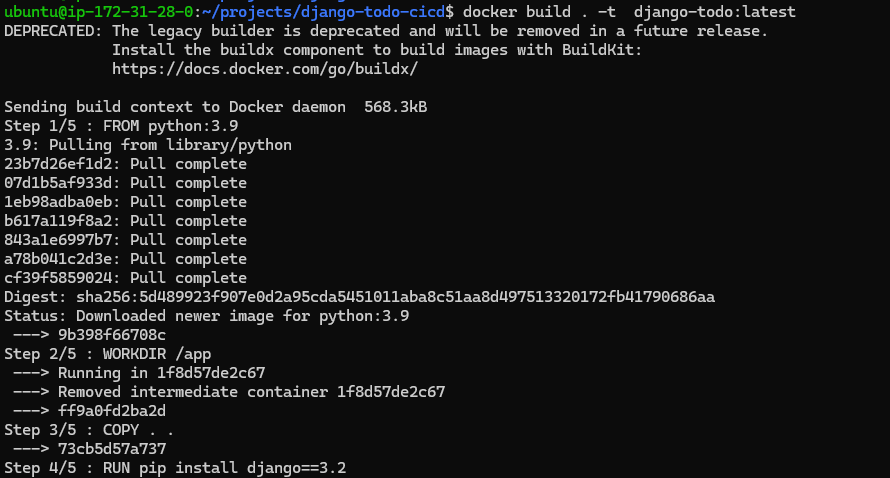
      #Run the Docker container
      docker run -dp 8000:8000 django-todo:latest

      #check the container
      docker ps
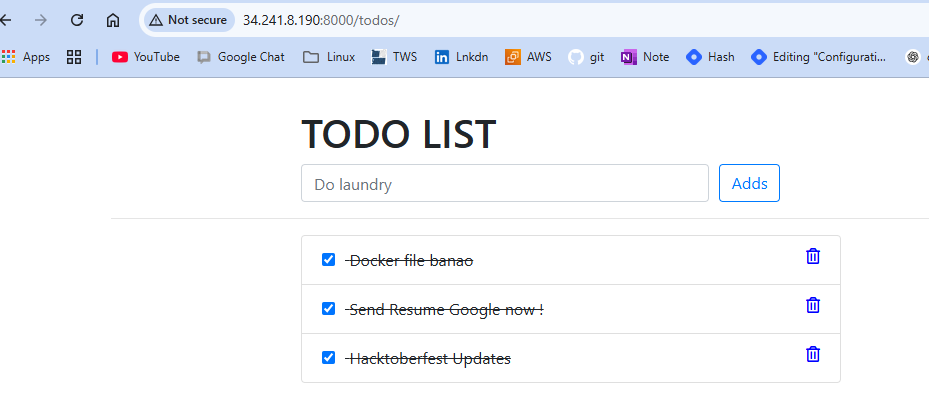
Once your container is up and running, you should see logs indicating that the python app is running on all interfaces:
  * Running on http://127.0.0.1:8000
  * Running on http://172.18.0.3:8000
This means the app is now accessible on your local machine at:
http://localhost:8000
Example 4: Node-js app
Clone the GitHub repository for the project (example, Node.js).
git clone https://github.com/var-priya/node-todo-cicd-1.git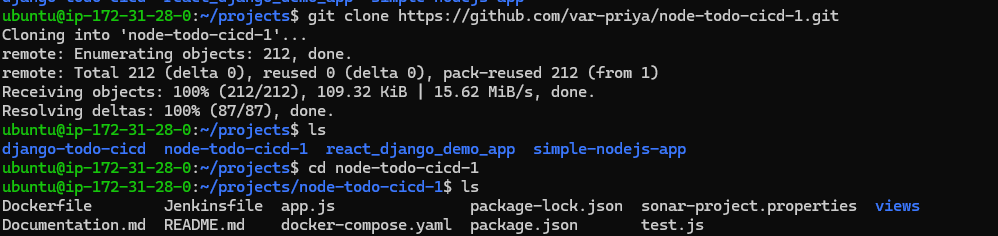
Create a dockerfile :
Dockerfile for Node.js:
  FROM node:12.2.0-alpine
  WORKDIR app
  COPY . .
  RUN npm install
  RUN npm run test
  EXPOSE 8000
  CMD ["node","app.js"]
Build and run the Docker container.
  #build the image
  docker build . -t node-todo:latest

  #check the images
  docker images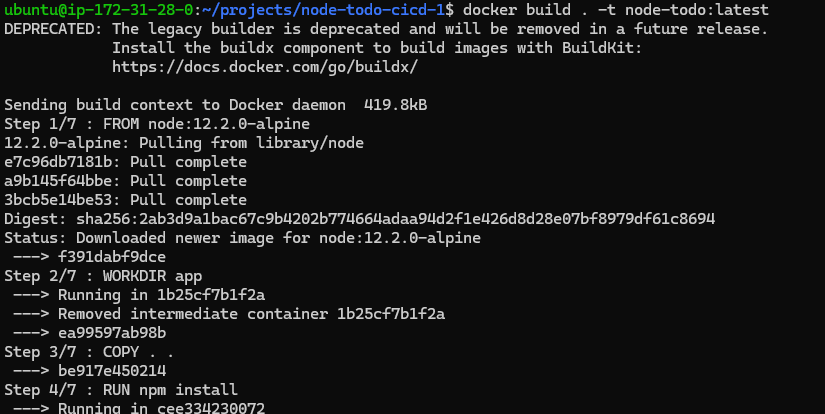
      docker run -dp 8000:8000 node-todo:latest
      #check the container
      docker ps
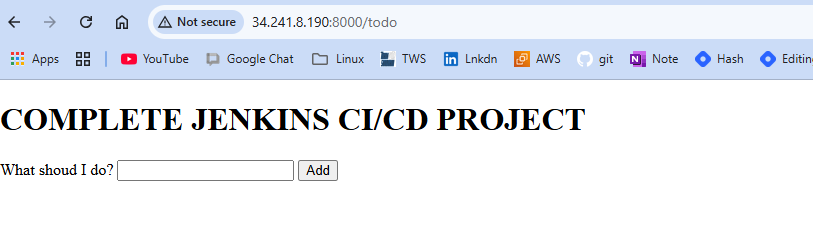
Once your container is up and running, you should see logs indicating that the Node-js app is running on all interfaces:
  * Running on http://127.0.0.1:8000
  * Running on http://172.18.0.3:8000
This means the app is now accessible on your local machine at:
http://localhost:8000
Example 5: Java-quotes-app
Clone the GitHub repository for the project (example, Java).
git clone https://github.com/var-priya/java-quotes-app.git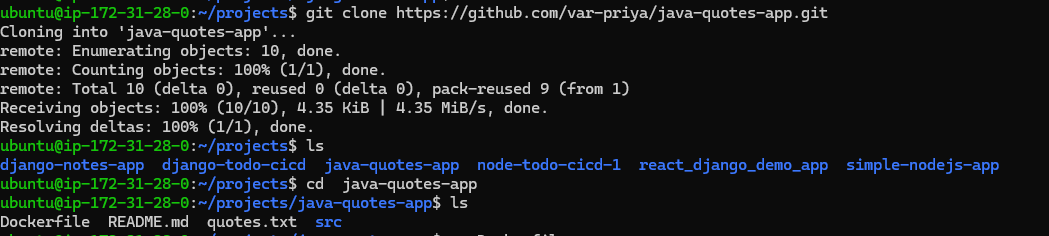
Create a dockerfile :
Dockerfile for Java:
  FROM openjdk:17-alpine

  WORKDIR /app

  COPY /src/Main.java /app/Main.java

  COPY quotes.txt quotes.txt

  RUN javac Main.java

  EXPOSE 8000

  CMD ["java","Main"]
1.
FROM openjdk:17-alpineFROM specifies the base image for the Docker image you want to create.
openjdk:17-alpineis a Docker image with OpenJDK 17 running on the Alpine Linux distribution, which is a lightweight, security-focused version of Linux. This base image includes the OpenJDK runtime and tools necessary to run Java applications.
2. WORKDIR /app
WORKDIR sets the working directory inside the container.
Any subsequent commands (like
COPY,RUN, etc.) will be executed in this directory./appis the directory where the Java source files and other necessary files will reside inside the container.
3. COPY /src/Main.java /app/Main.java
COPY copies files from the host (your local machine) into the Docker image.
/src/Main.javarefers to the location of theMain.javafile on your local machine (relative to the location of the Dockerfile)./app/Main.javais where theMain.javafile will be placed inside the container.- Essentially, this copies the
Main.javafile from your source code directory to the/appdirectory inside the container.
- Essentially, this copies the
4. COPY quotes.txt quotes.txt
This COPY command is used to copy the
quotes.txtfile from your host machine into the container.The first
quotes.txtrefers to the source file on the host machine, and the secondquotes.txtrefers to the target file inside the container, placed in the current directory (which is/appdue to the earlierWORKDIRcommand).
5. RUN javac Main.java
RUN executes commands inside the container during the build process.
javacMain.javacompiles theMain.javafile into Java bytecode (i.e.,.classfiles).- After running this command, the compiled class file (
Main.class) will exist in the/appdirectory inside the container.
- After running this command, the compiled class file (
6. EXPOSE 8000
EXPOSE tells Docker that the container will listen on port
8000at runtime.This does not actually publish the port, but it is a way to document that the application is expected to use this port for communication. If you run the container, you'll typically want to map this to a port on your host system.
7. CMD ["java", "Main"]
CMD specifies the command to run when the container starts.
This tells Docker to run the Java application by executing
java Main. This command will start the Java application and run theMainclass.javais the Java runtime command, andMainis the name of the compiled Java class (created fromMain.java).
Build and run the Docker container.
                            #build the image
                            docker build . -t java-quotes-app:latest

                            #check the images
                            docker images
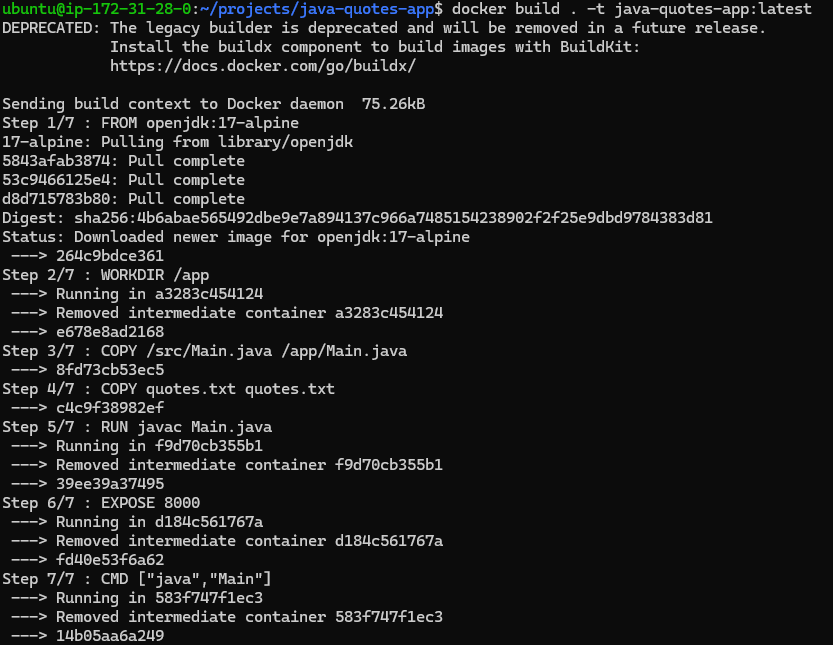
  docker run -dp 8000:8000 --name Java-app java-quotes-app:latest
  #check the container
  docker ps

Once your container is up and running, you should see logs indicating that the Java app is running on all interfaces:
  * Running on http://127.0.0.1:8000
  * Running on http://172.18.0.3:8000
This means the app is now accessible on your local machine at:
http://localhost:8000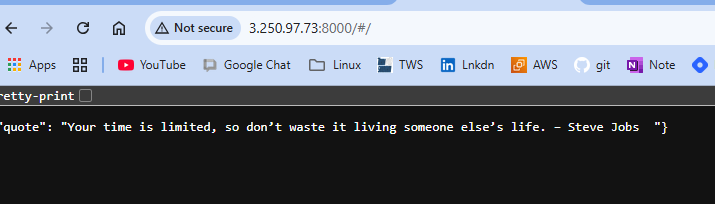
Dockerizing Your Applications: A Quick Guide
Dockerizing your applications simplifies deployment and ensures consistency across different environments. Here's how to get started:
Create a Dockerfile: Write a
Dockerfilethat specifies how to build your app's Docker image. It should define your app’s dependencies, working directory, and startup command.Build the Image: Use
docker buildto create your Docker image based on the Dockerfile.Run the Container: Start your app inside a container using
docker run, mapping necessary ports for communication.Optional: Use Docker Compose: For multi-service applications (e.g., a database with your app), use Docker Compose to simplify service management and orchestration.
With Docker, you ensure your app runs the same way on any machine, making it easier to deploy, scale, and maintain.
Thank you for reading :)