End to End DevSecOps Project for DevOps Engineers.
👋 Hello, and welcome to my DevOps journey! 🚀 I am Priyanka Varshney,🛠️ As an aspiring DevOps engineer, I'm all about bridging the gap between development and operations, making software delivery seamless and efficient. 💻🔧 On this Hashnode blog, I'll be sharing my learnings, experiences and adventures as I dive deep into the world of continuous integration, automation, and cloud technologies. ☁️⚙️ Let's connect, learn, and grow as a vibrant DevOps community. Follow my Hashnode blog, and let's embrace the DevOps adventure together! 🤝🔗
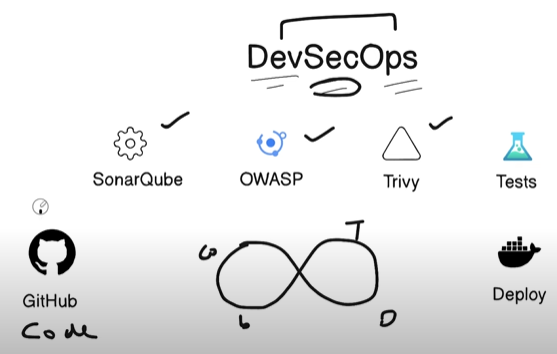
In this project, we will learn about DevOps and DevSecOps tools in one project:
Tools Covered:
Linux
Git and GitHub
Docker
Docker-compose
Jenkins CI/CD
SonarQube
OWASP
Trivy
Pre-requisites to implement this project:
AWS EC2 instance (Ubuntu) with instance type t2.large and root volume 15GB.
Java and Jenkins installed:https://www.jenkins.io/doc/book/installing/linux/#long-term-support-release
Docker and docker-compose installed:
      sudo apt-get update
      sudo apt-get install docker.io -y
      sudo apt-get install docker-compose -y
Trivy installed:
Install Trivy
sudo apt-get install wget apt-transport-https gnupg lsb-releasewget -qO - https://aquasecurity.github.io/trivy-repo/deb/public.key | gpg --dearmor | sudo tee /usr/share/keyrings/trivy.gpg > /dev/nullecho "deb [signed-by=/usr/share/keyrings/trivy.gpg] https://aquasecurity.github.io/trivy-repo/deb $(lsb_release -sc) main" | sudo tee -a /etc/apt/sources.list.d/trivy.listsudo apt-get updatesudo apt-get install trivySonarQube Server installed
docker run -itd --name sonarqube-server -p 9000:9000 sonarqube:lts-communityNow you need to open the port 9000 and access using ipaddress:9000
To containerize the application, begin by creating separate Dockerfiles for the frontend and backend. These Dockerfiles will define the environment setup, dependencies, and commands needed to run each service inside its own container.
Dockerfile for Frontend:
  # ------------------- Stage 1: Build Stage ------------------------------
  FROM node:21 AS frontend-builder

  # Set the working directory to /app
  WORKDIR /app

  # Copy the package.json and package-lock.json for dependency installation
  COPY package*.json ./

  # Install dependencies
  RUN npm install

  # Copy the rest of the application code
  COPY . .

  # ------------------- Stage 2: Final Stage ------------------------------
  FROM node:21-slim

  # Set the working directory to /app
  WORKDIR /app

  # Copy built assets and dependencies from frontend-builder stage
  COPY --from=frontend-builder /app .

  # Copy the .env.sample file to .env.local
  COPY .env.docker .env.local

  # Expose port 5173 for the Node.js application
  EXPOSE 5173

  # Define the default command to run the application in development mode
  CMD ["npm", "run", "dev", "--", "--host"]
Dockerfile for Backend:
  # Stage 1
  FROM node:21 AS backend-builder

  # setup the working dir
  WORKDIR /app

  # code
  COPY . .

  # packages install
  RUN npm i

  # tests
  RUN npm run test

  # Stage 2
  FROM node:21-slim

  # setup the working dir
  WORKDIR /app

  # copy the above stage as compressed
  COPY --from=backend-builder /app .

  COPY .env.docker .env

  # Port
  EXPOSE 8080

  # App
  CMD ["npm", "start"]
Once both Dockerfiles are ready, you’ll need to create a
docker-compose.ymlfile. This file helps you define and manage multi-container Docker applications. With Docker Compose, you can run both the frontend and backend containers simultaneously, configure networking between them, and even manage volumes or environment variables in a centralized manner.version: "3.8" services: mongodb: container_name: mongo-service image: mongo:latest volumes: - ./backend/data:/data ports: - "27017:27017" backend: container_name: backend build: ./backend env_file: - ./backend/.env.docker ports: - "31100:8080" depends_on: - mongodb frontend: container_name: frontend build: ./frontend env_file: - ./frontend/.env.docker ports: - "5173:5173" redis: container_name: redis-service restart: unless-stopped image: redis:7.0.5-alpine expose: - 6379 depends_on: - mongodb volumes: data:Steps for Jenkins CI/CD:
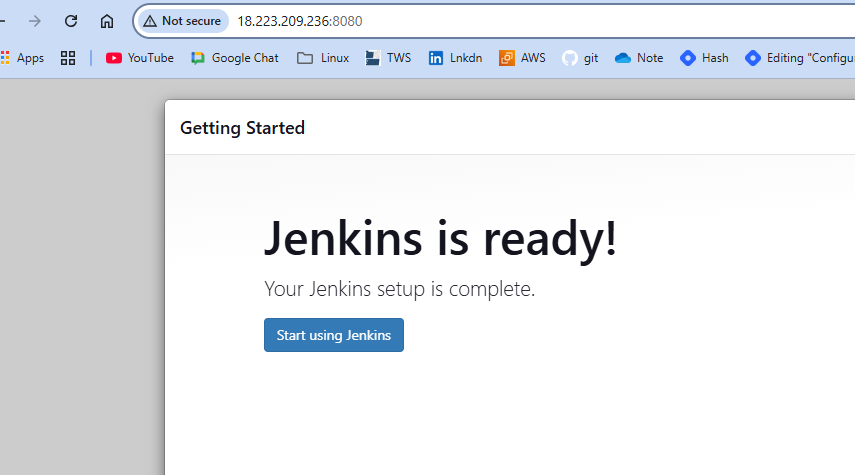
Access Jenkins UI with IPaddress:8080 and setup Jenkins
2. Go to Manage Jenkins, click on Plugins and install all the plugins listed below, we will require for other tools integration:
SonarQube Scanner (Version2.16.1)
Sonar Quality Gates (Version1.3.1)
OWASP Dependency-Check (Version5.4.3)
Docker (Version1.5)
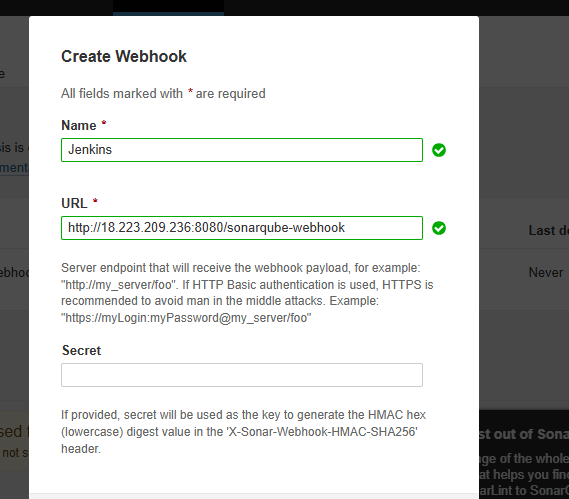
- Open SonarQube and create a webhook.
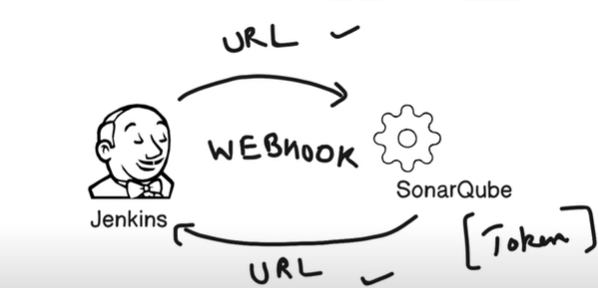
Navigate to the SonarQube dashboard, then go to Administration » Configuration » Webhooks to add a new webhook by entering a name and provide Jenkins URL followed by /sonarqube-webhook
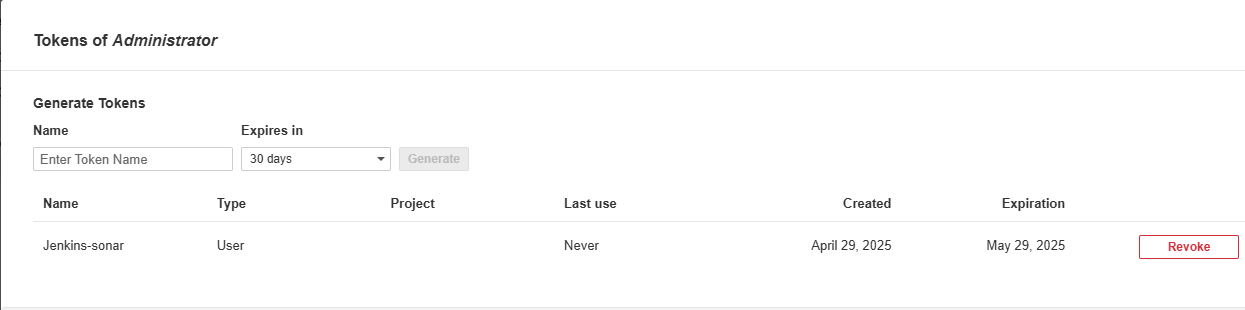
- Generate a personal access token.
Go to SonarQube » My Account » Security (accessible via the 3-line menu at the top right), then create a new token to use for authentication by entering a Token name.
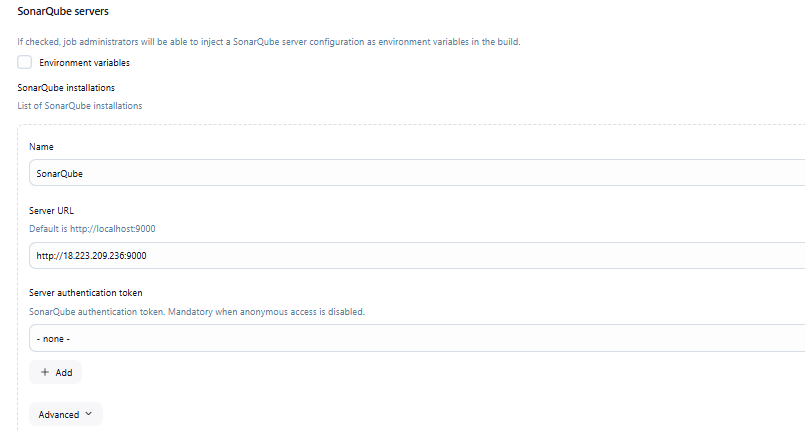
- In Jenkins, go to "Manage Jenkins" > "System", then add your SonarQube server under the "SonarQube Servers" section by entering a name for the SonarQube server and provide its URL.
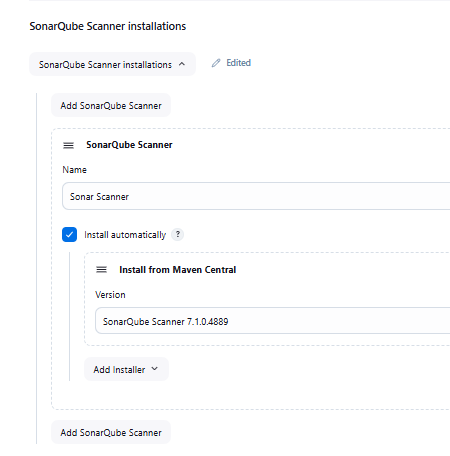
In Jenkins Add SonarQube Scanner , go to “Tools “ and add the SonarQube Scanner by entering the name and click on install automatically.
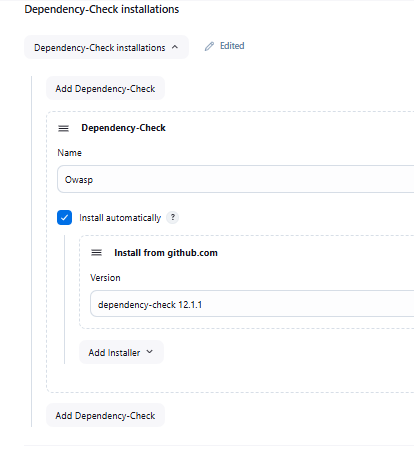
In Jenkins Add Dependency Check , go to “Tools “ and add the Dependency Check by entering the name and click on install automatically.
Create a job
Step 1: Create a New Job
Go to Jenkins Dashboard → New Item
Enter job name:
DevSecOps-CICDChoose Pipeline
Click OK
Step 2: Configure Pipeline
In the General section:
Add a description
Check GitHub Project and enter repo URL
In the Build Triggers:
- Check GitHub hook trigger for GITScm polling
In Pipeline section:
Definition: Pipeline script
Paste the same script as in the console (below)
            pipeline{
                agent any
                environment {
                    SONARQUBE_ENV = tool 'SonarScanner' //should be same as sonarScanner
                }
                stages{
                    stage("Code clone from github"){
                        steps{
                           git url: "https://github.com/var-priya/Wanderlust_with_DevSecOps.git", branch:"main"
                         }
                    }
                    stage("SonarQube Analysis"){
                         steps{
                           withSonarQubeEnv("Sonar"){   //should be same as sonar server
                                sh "$SONARQUBE_ENV/bin/sonar-scanner -Dsonar.projectKey=wanderlust -Dsonar.projectKey=wanderlust"
                            }
                         }
                    }
                    stage("Owasp dependency check"){
                         steps{
                           dependencyCheck additionalArguments:'--scan ./' , odcInstallation: 'Owasp'
                           dependencyCheckPublisher pattern: '**/dependency-check-report.xml'
                         }
                    }
                    stage("Sonar Quality Gate Scan"){
                         steps{
                           timeout(time: 2, unit: 'MINUTES'){
                               waitForQualityGate abortPipeline: false
                           }
                         }
                    }
                    stage("Trivy File system Scan"){
                         steps{
                           sh "trivy fs --format table -o trivy-fs-report.html"
                         }
                    }
                    stage("Deploy using docker compose "){
                         steps{
                           sh "docker-compose up -d"
                         }
                    }

             }
            }
Step 3: Save and Build
Click Save
Click Build Now to trigger the pipeline manually
Or trigger from GitHub using webhook
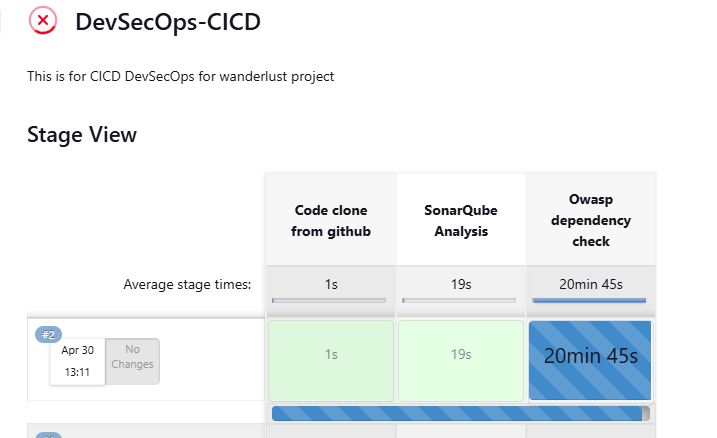
Note: The OWASP stage may take some time to complete, as it performs a thorough security scan to identify vulnerabilities in the application's dependencies and codebase.
Since OWASP Dependency-Check performs a deep analysis of all third-party libraries and compares them against known CVE databases, it can take several minutes, especially for large projects.
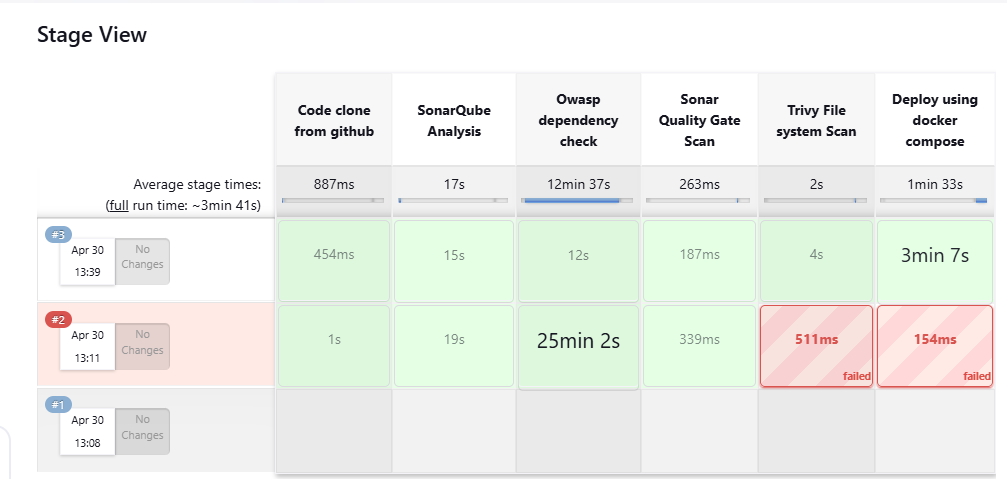
Verify the Deployment:
To access the application, open your browser and visit:
http:// IPaddress:5173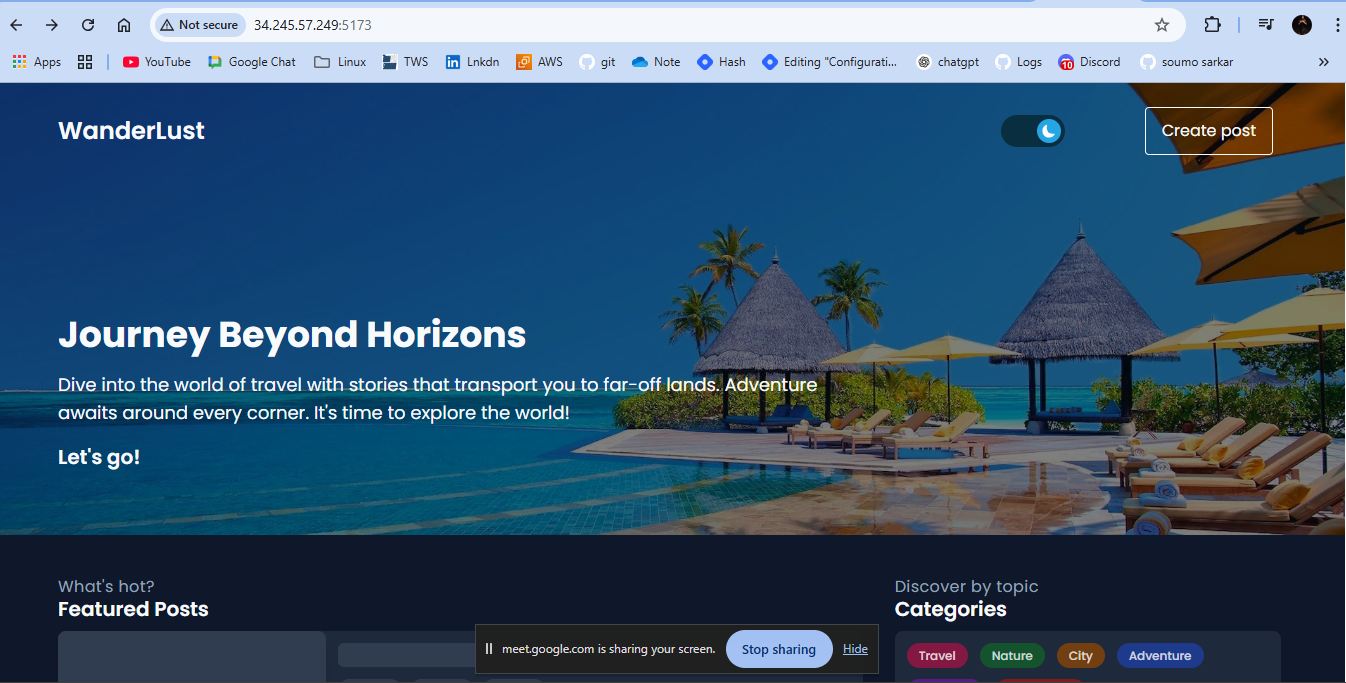
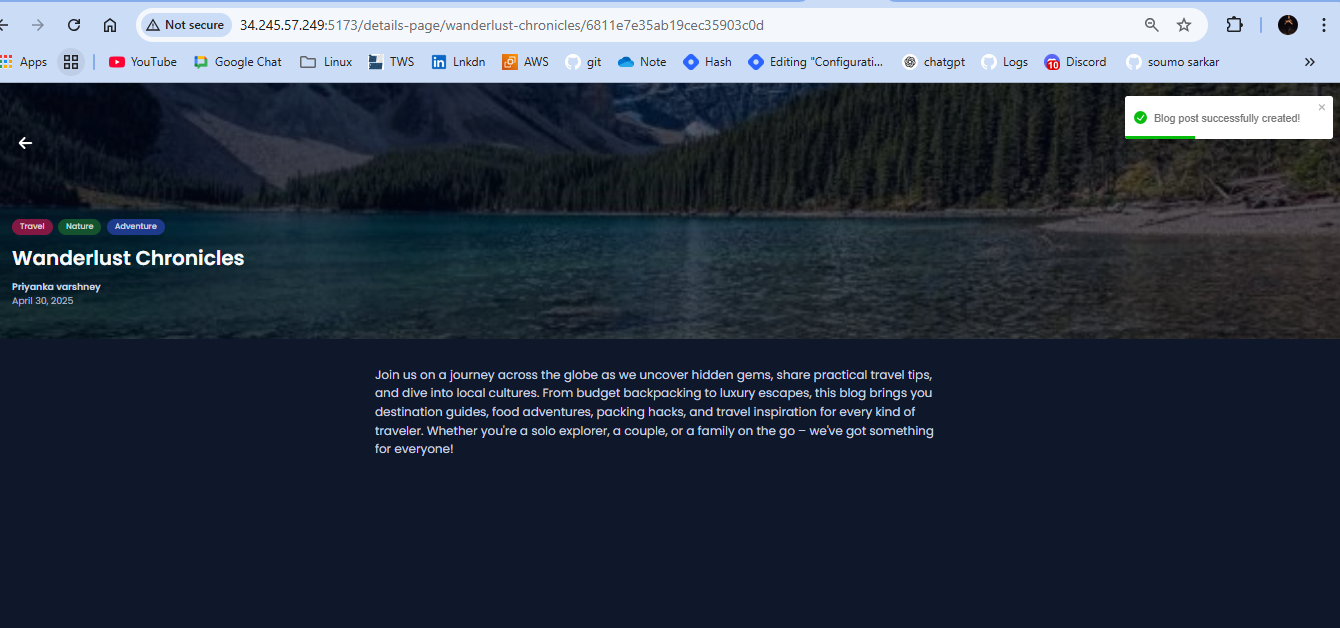
Now you can create the post:
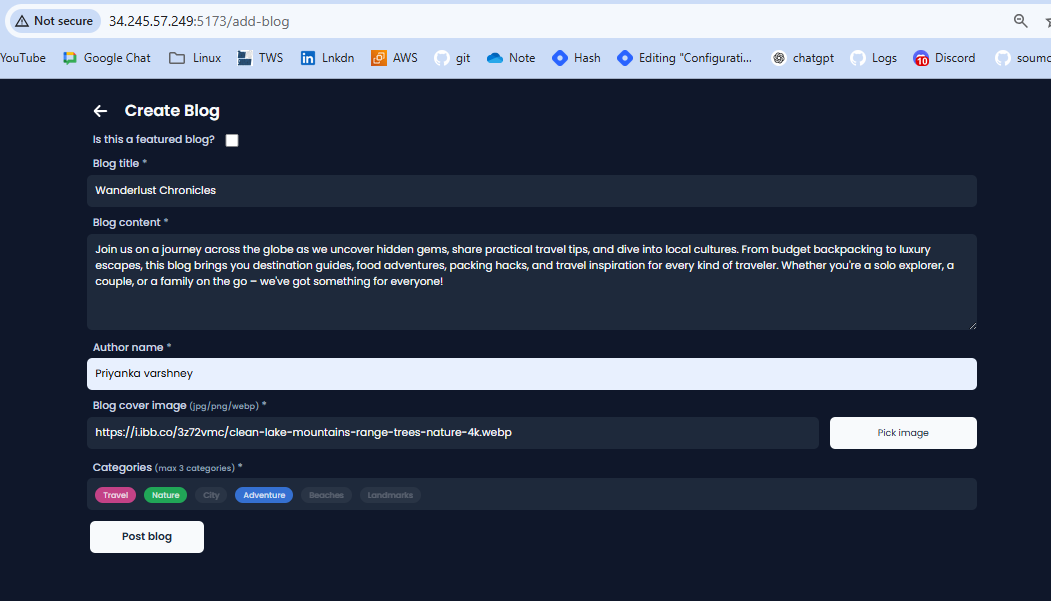
Now you can see the post :
Conclusion
Congratulations! 🎉 Your Wanderlust application is now up and running on Jenkins with security tools. If you encounter any issues along the way, be sure to check the logs or consult the troubleshooting guide.
Wishing you smooth deployments and happy coding! 🚀