Week 3: Git and GitHub Challenge
👋 Hello, and welcome to my DevOps journey! 🚀 I am Priyanka Varshney,🛠️ As an aspiring DevOps engineer, I'm all about bridging the gap between development and operations, making software delivery seamless and efficient. 💻🔧 On this Hashnode blog, I'll be sharing my learnings, experiences and adventures as I dive deep into the world of continuous integration, automation, and cloud technologies. ☁️⚙️ Let's connect, learn, and grow as a vibrant DevOps community. Follow my Hashnode blog, and let's embrace the DevOps adventure together! 🤝🔗

1. Fork and Clone the Repository
Fork the Repository:
- Visit the repository and fork it to your GitHub account.
Clone Your Fork Locally:
Clone the forked repository using HTTPS:
git clone <your-fork-url>Navigate into the cloned repository directory:
cd <Repo-name>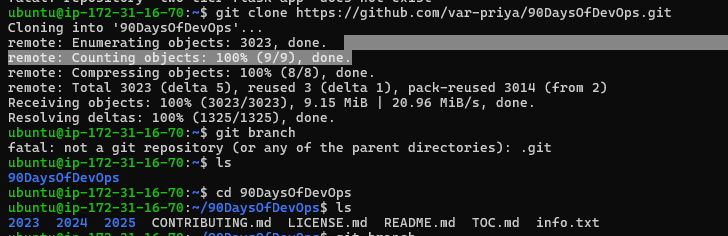
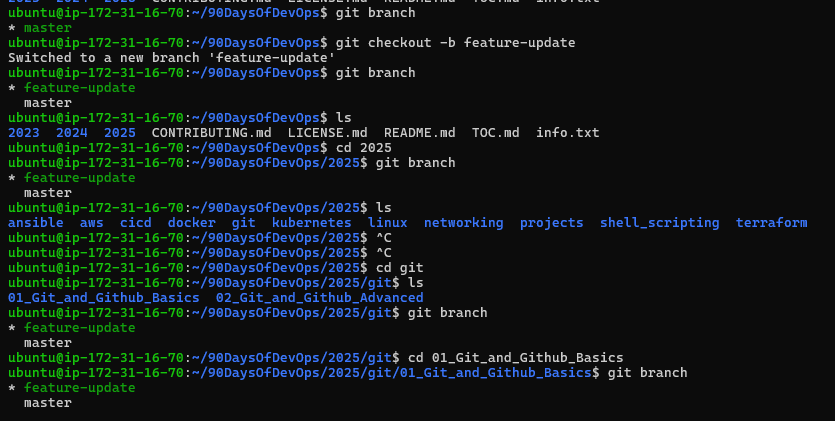
Create a New Branch:
Create a branch called
feature-update:git checkout -b feature-update
2. Initialize a Local Repository and Create a File
Set Up Your Challenge Directory:
Inside the cloned repository, create a new directory for this challenge:
  mkdir week-4-challenge
  cd week-4-challenge
Create a File:
- Create a file named
info.txtand add some initial content.
- Create a file named
Stage and Commit Your File:
Stage the file:
git add info.txt
You can monitor the status of your files using the
git statuscommand. This command will inform you whether a file is untracked or tracked.Commit the file with a descriptive message:
git commit -m "Initial commit: Add info.txt with introductory content"
3.Configure Remote URL with PAT and Push/Pull
Configure Remote URL with Your PAT:
To avoid entering your Personal Access Token (PAT) every time you push or pull, update your remote URL to include your credentials.⚠️ Note: Embedding your PAT in the URL is only for this exercise. It is not recommended for production use.
Replace
<your-username>,<your-PAT>, and<repository-name>with your actual GitHub username, your PAT, and the repository name respectively:git remote add origin https://<your-username>:<your-PAT>@github.com/<your-username>/90DaysOfDevOps.gitIf a remote named
originalready exists, update it with:git remote set-url origin https://<your-username>:<your-PAT>@github.com/<your-username>/90DaysOfDevOps.git
Push Your Commit to Remote:
Push your current branch (typically
main) and set the upstream:git push origin master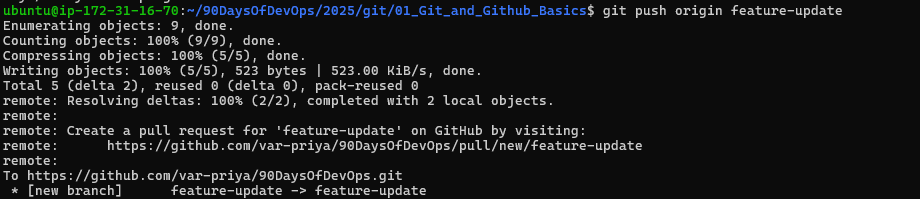
(Optional) Pull Remote Changes:
Verify your configuration by pulling changes:
git pull origin master4.Explore Your Commit History
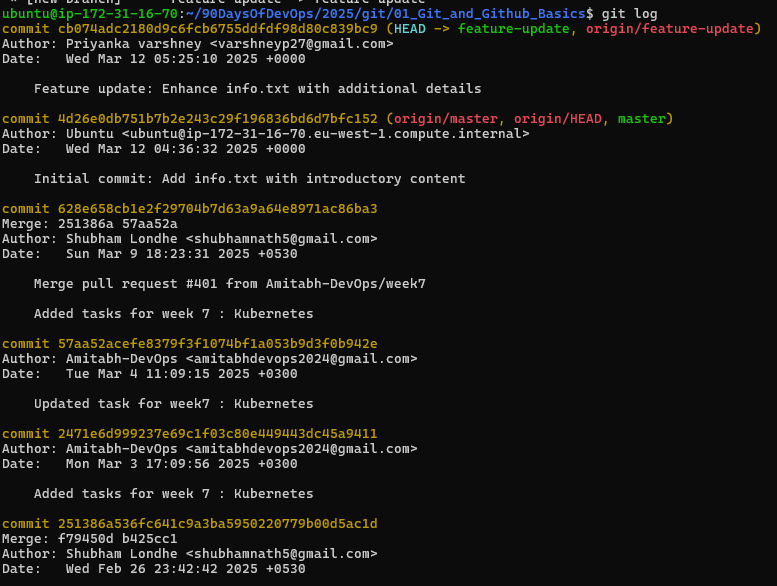
View the Git Log:
Check your commit history using:
git logTake note of the commit hash and details as you will reference these in your documentation.
(Advanced) Optional Extra Challenge:
- If you feel confident, create another branch (e.g.,
experimental) from your main branch, make a conflicting change toinfo.txt, then switch back tofeature-updateand mergeexperimentalto simulate a merge conflict. Resolve the conflict manually, then commit the resolution.
- If you feel confident, create another branch (e.g.,
Create a new branch named experimental and switch to it. Here's the command you'll use:
git checkout -b experimental
This command does two things:
Creates a new branch named
experimental.Switches to the new branch so you can start working on it.
Let’s say you are on the feature-update branch and want to merge the experimental branch:
git checkout feature-update
git merge experimental
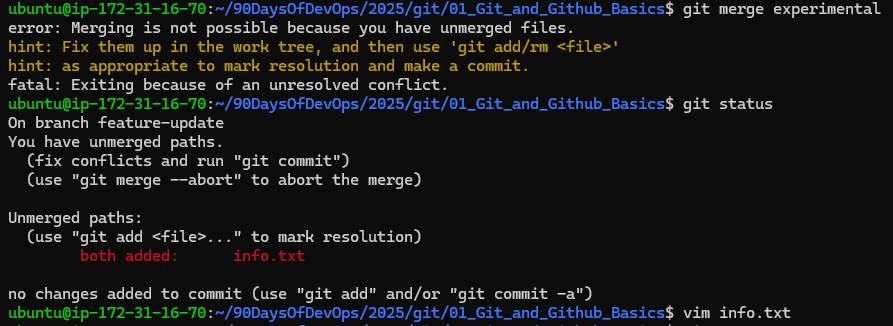
Merge conflicts in Git can be a bit tricky, but don't worry—we can sort this out. Here's a step-by-step guide to resolve this:
Identify the Conflict: Check which lines in the file have conflicts. Git marks them with
<<<<<<<,=======, and>>>>>>>to show where changes from different branches start and end.Open the File: Open the
info.txtfile in your favorite text editor.Locate Conflict Markers: You'll see something like this in your file:
plaintext
 <<<<<<< HEAD
 Your changes in the current branch
 =======
 Changes from the branch you are merging
 >>>>>>> branch-name
Resolve the Conflict: Choose which changes you want to keep or merge them together. Edit the file to remove the conflict markers and save it.
Stage the File: After you've resolved the conflicts, stage the changes using:
bash
git add info.txtCommit the Merge: Commit the merge with a message, ten can push the changes to remote.
 git commit -m "Resolved merge conflict in info.txt"
 git push origin feature-update
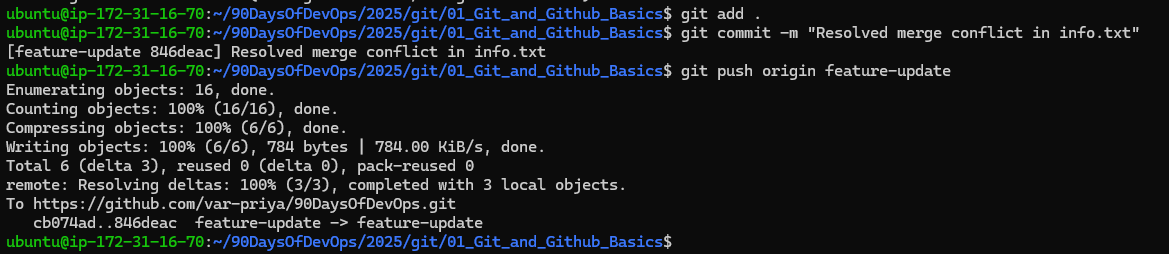
5. Explain Branching Strategies
Document Your Process:
Create (or update) a file named
solution.mdin your repository.List all the Git commands you used in Tasks 1–4.
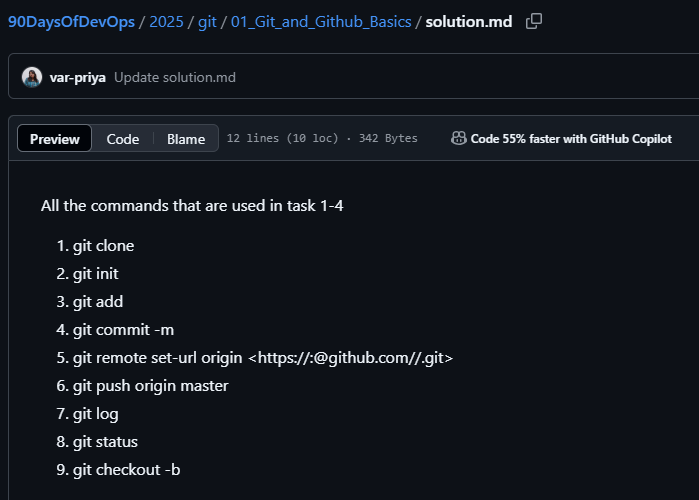
Branching Strategies:
Isolate Changes: Each feature or bug fix gets its own space, so it doesn't mess with the main project.
Work Together: Multiple people can work on different things at the same time without stepping on each other's toes.
Fewer Conflicts: Keeping changes separate helps avoid problems when combining everyone's work.
Review Easily: It’s easier to check and approve changes before they become part of the main project.
Thank you for reading :-)